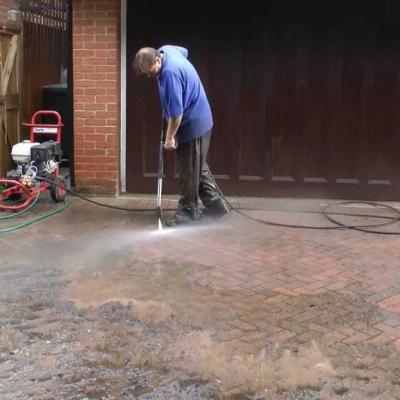
If you could put in some hard work to massively improve the curb appeal of your home, would you do it?
You could easily pay someone to come and pressure wash your house, but there’s more pride when you come home to a beautiful house that you’ve put your own hard work and dedication into.
By renting or purchasing just one tool, you can make the outside of your home look brand new. Using a pressure washer, you can clean your roof, gutters, house exterior walls, fences, porches & decks, concrete driveways & sidewalks and so much more!
Below we’ve listed the 10 steps it takes to make your home look new.
Step 1: Do Your Research
If you’re reading this, you’re taking the first step. Do some research on the different ways you can use a pressure washer to clean your house and your property. There may be ideas you didn’t even think of, such as your pool sidewalk or your roof. Checkout the websites for local pressure washing companies and see what their latest and greatest services are, checkout their videos and tips for how to do it.
Step 2: Buy or Rent Your Pressure Washer
Consider how often you plan to use the pressure washer and what your budget is to help decide if purchasing is right for you or if renting is the best option. The good news is that if you can’t afford a pressure washer right now, or your not sure you will want to do this again in the future, you can easily rent a pressure washer for much less money than if you purchase it.
Step 3: Prepare Your Surfaces
No matter what surface you've decided to pressure wash, you will need to clear debris and excess grease, dirt, pollen, dust, algae, mold, etc. from the surface. For some you could probably just use a broom to knock it off or you may need to use degreaser.
Step 4: Protect Exterior Windows and Doors
Cover nearby exterior windows and doors with plastic sheeting and painter’s tape. This will protect doors and windows from loose debris as well as any accidental paint or stain removal from pressure washer.
Step 5: Read Safety Manual
This step is so much more important than most people realize. It can save time and aggravation to thoroughly read the proper steps needed to operate your specific pressure washer properly. Each pressure washer is different and may require special preparation, assembly or attachments.
Step 6: Prepare Pressure Washer for Detergent
Before you begin pressure washing, consider using a good quality biodegradable pressure washer safe detergent. Applying some detergent first will help to loosen the dirt, pollen, algae, moss, or lichen so it's easier to remove and doesn't take as many granules with it.
To prepare the pressure washer for detergent, attach a spray wand tip for detergent. Select the tip designated for washing, often labeled “soap.” Snap it into place at the head of the spray wand.
Connect the supplied pressure-washer hose and wand to your pressure washer. Next, attach a garden hose to the pressure washer’s water supply and turn on your water.
Place your detergent siphon tube, usually supplied with and attached to pressure washer, directly into detergent container. Once pressure washer is crank-started, tube will immediately bring detergent into water stream of spray wand.
Step 7: Spray Detergent
Protect your hands with safety gloves, then apply your detergent, keeping a consistent distance of 8 - 18 inches from the surface. Work your way back and forth in a smooth, controlled manner, overlapping each stroke by 6 to 8 inches. Let sprayed detergent sit on surface for 5 minutes.
Work in sections. Apply detergent to one area of the surface (roof, driveway, etc), and then spray it clean. Move to the next area and do the same thing. This works best if you have a pressure washer with an on-board detergent tank that can be switched on and off accordingly.
Step 8: Pressure-Wash Surface
Change your tip labeled “soap” to tip labeled “25 degree.” Pressure-wash your surface by holding down the spray handle, working your way back and forth from one side of concrete surface to the other, overlapping each stroke by 6 to 8 inches. For tougher stains such as paint, hold tip 3 to 4 inches from the surface, moving with slower, nearly still strokes to ensure removal.
You won't want to use a lot of pressure when you spray certain parts of your home such as the shingles, as too much pressure can strip your shingles of their protective granules or even damage or remove the shingles themselves. This is why you need to do step 1 - do your research before pressure washing anything.
Step 9: Seal Your Concrete
If you pressure wash your concrete such as a driveway or sidewalk, covering it in a waterproof sealer can make it really stand out. Start by pouring your sealer into paint pan and grabbing a paint roller. Start in the middle of the concrete and spread your waterproof sealer out from middle to all edges of the surface. Allow 24 hours before parking or placing furniture back on the concrete.
Safety: As with any power tool, proper operation is the key to safety when using a pressure washer. In addition to reading the user's manual so you understand proper operation, always wear protective eyewear and gloves.
Browse our Lawn & Garden Tool Rentals to find more garden and power tools to spruce up your curb appeal.
If you need new, used or rental lawn and garden equipment, call us at (803) 736-7368. If you have any difficulties getting through our phone system, please use our Contact Form.
Besure to ollow us on Facebook and Twitter, and sign up for our Free Monthly Newsletters.

